
This one is a very simple but cool project, something that I would recommend to anyone who is interested into DIY electronics, gadgets and learning new stuff in general. It is definitely one of those projects that don’t require too much time but you can learn a lot by making it and also earn a lot of credit by sharing it with your friends and family.
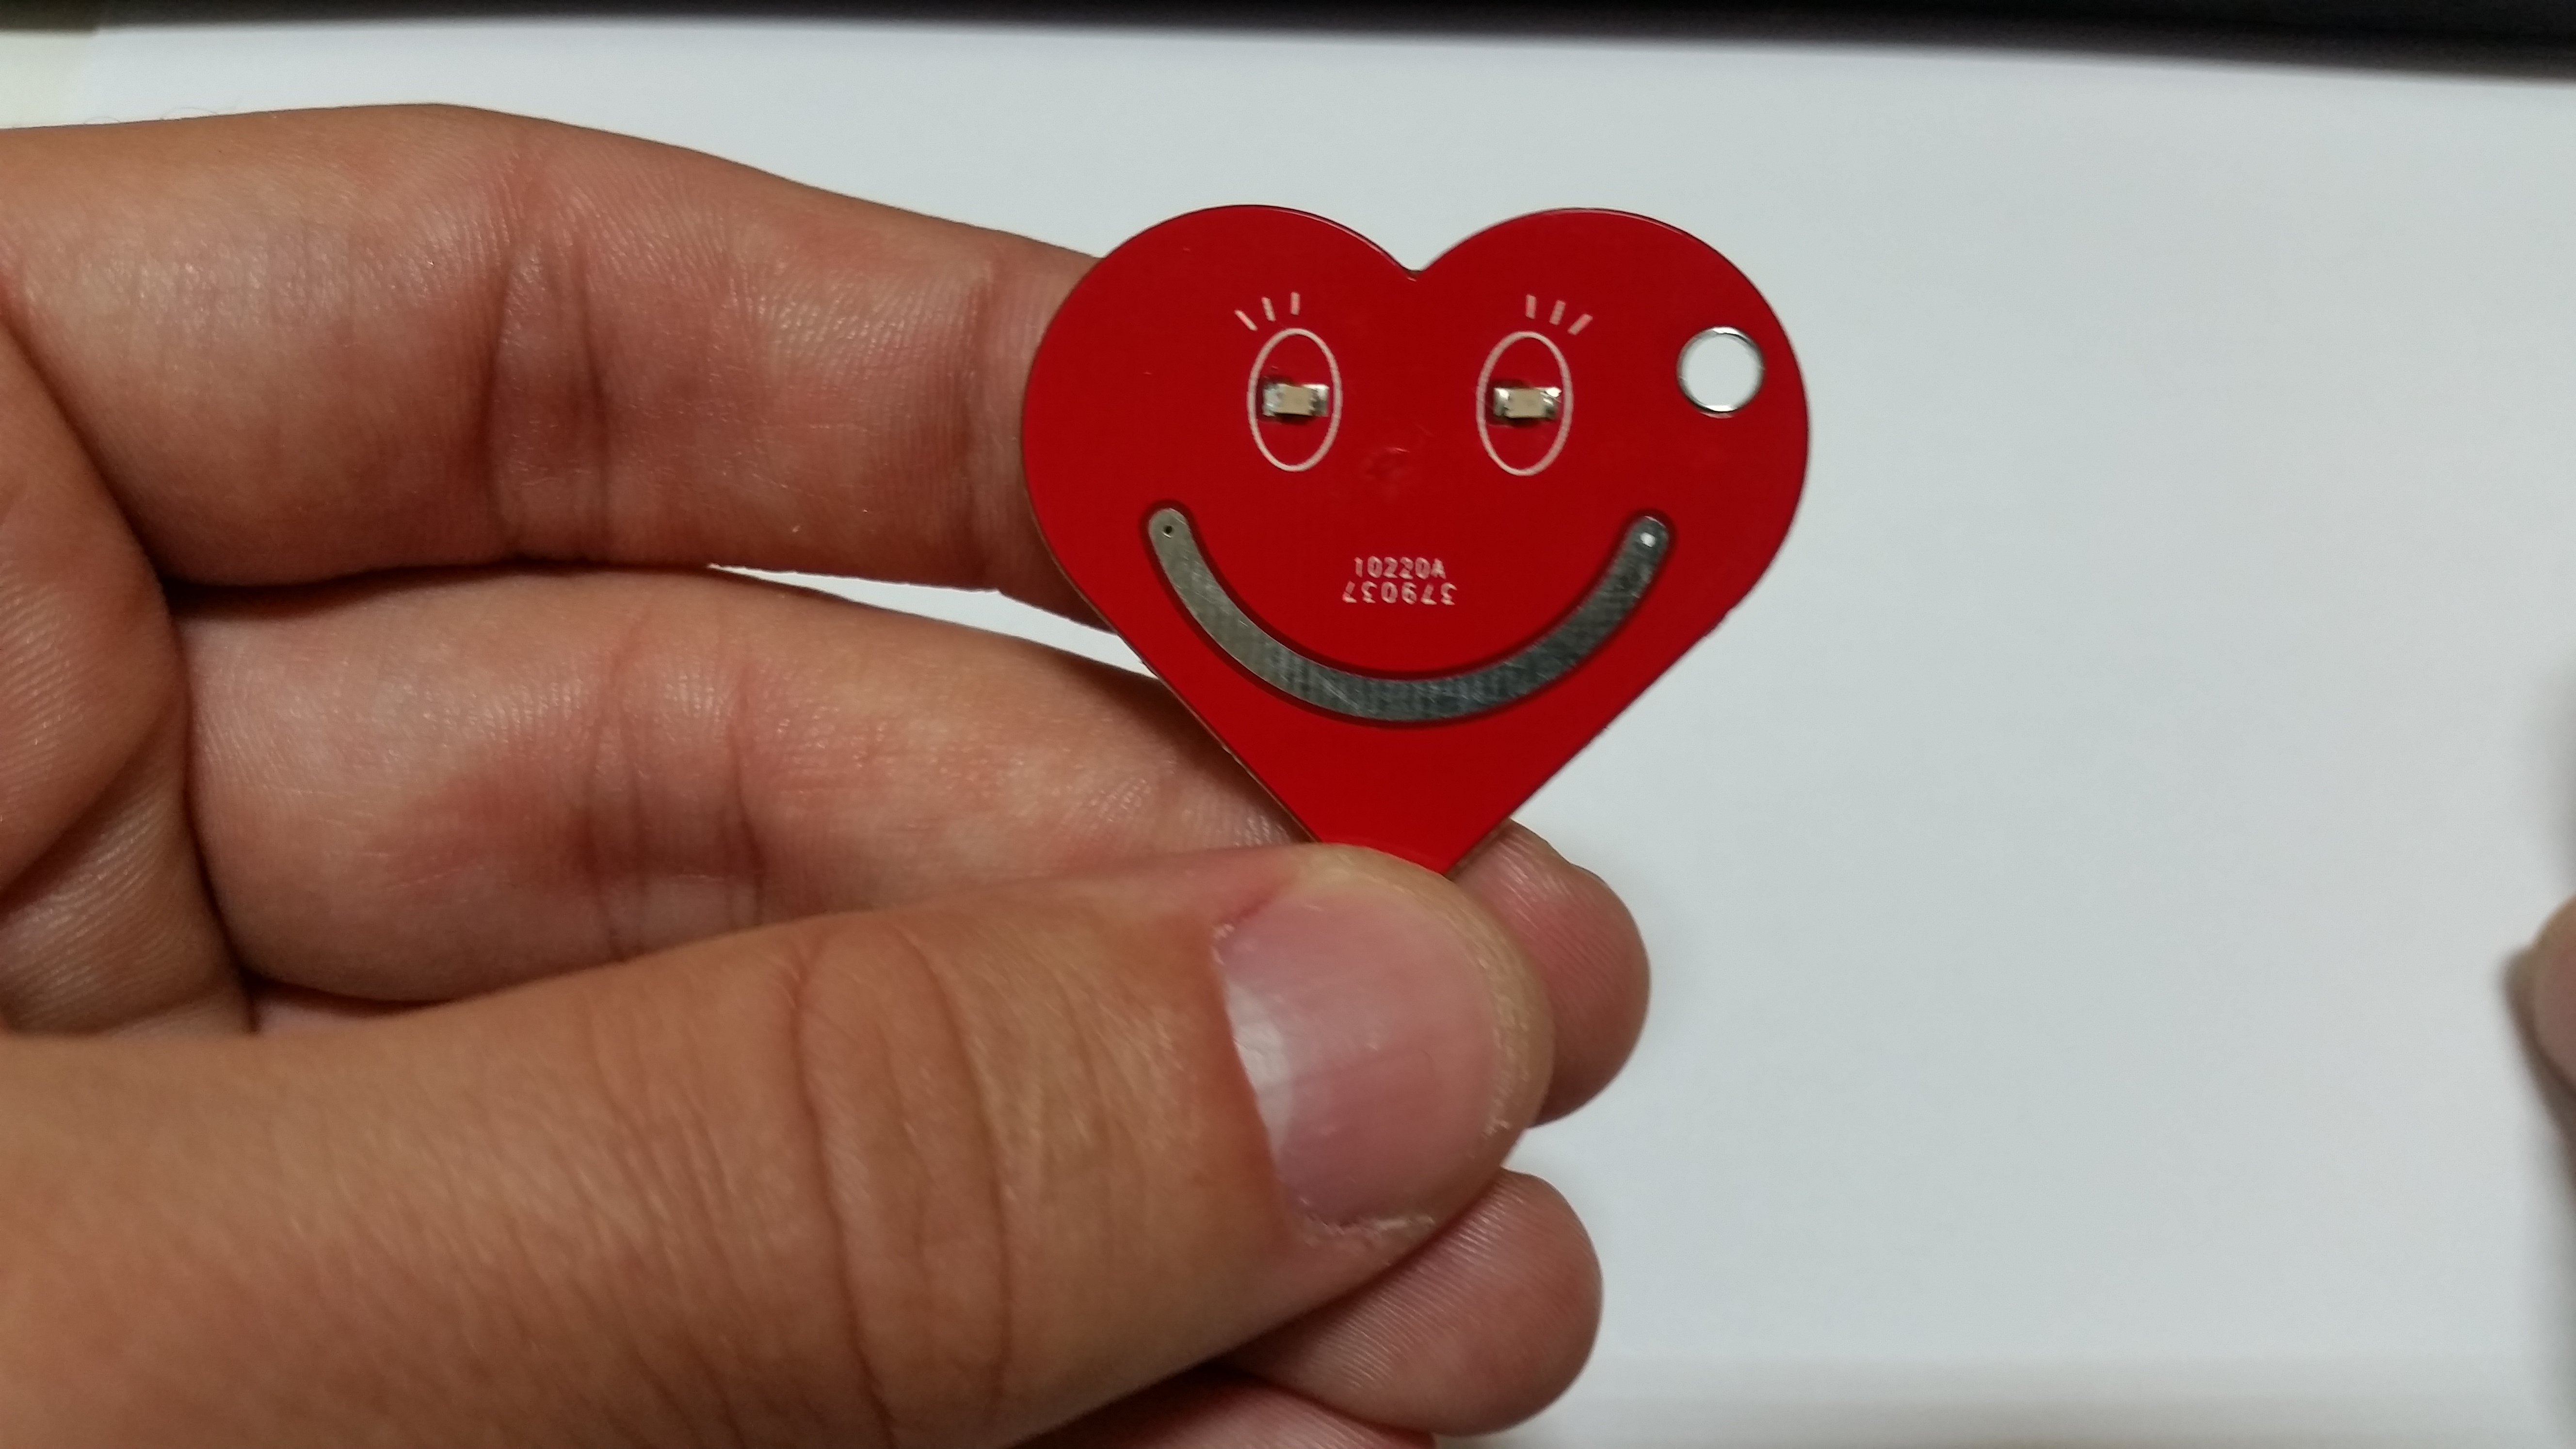
Below you can see a final product. It’s a heart shaped, touch sensitive, keychain for your loved ones. On the front side there is a smiley face drawing that has eyes and mouth. Eyes have two red LEDs that will start to pulse once you touch the keychain or place you finger on the smiley face (see it in action below)
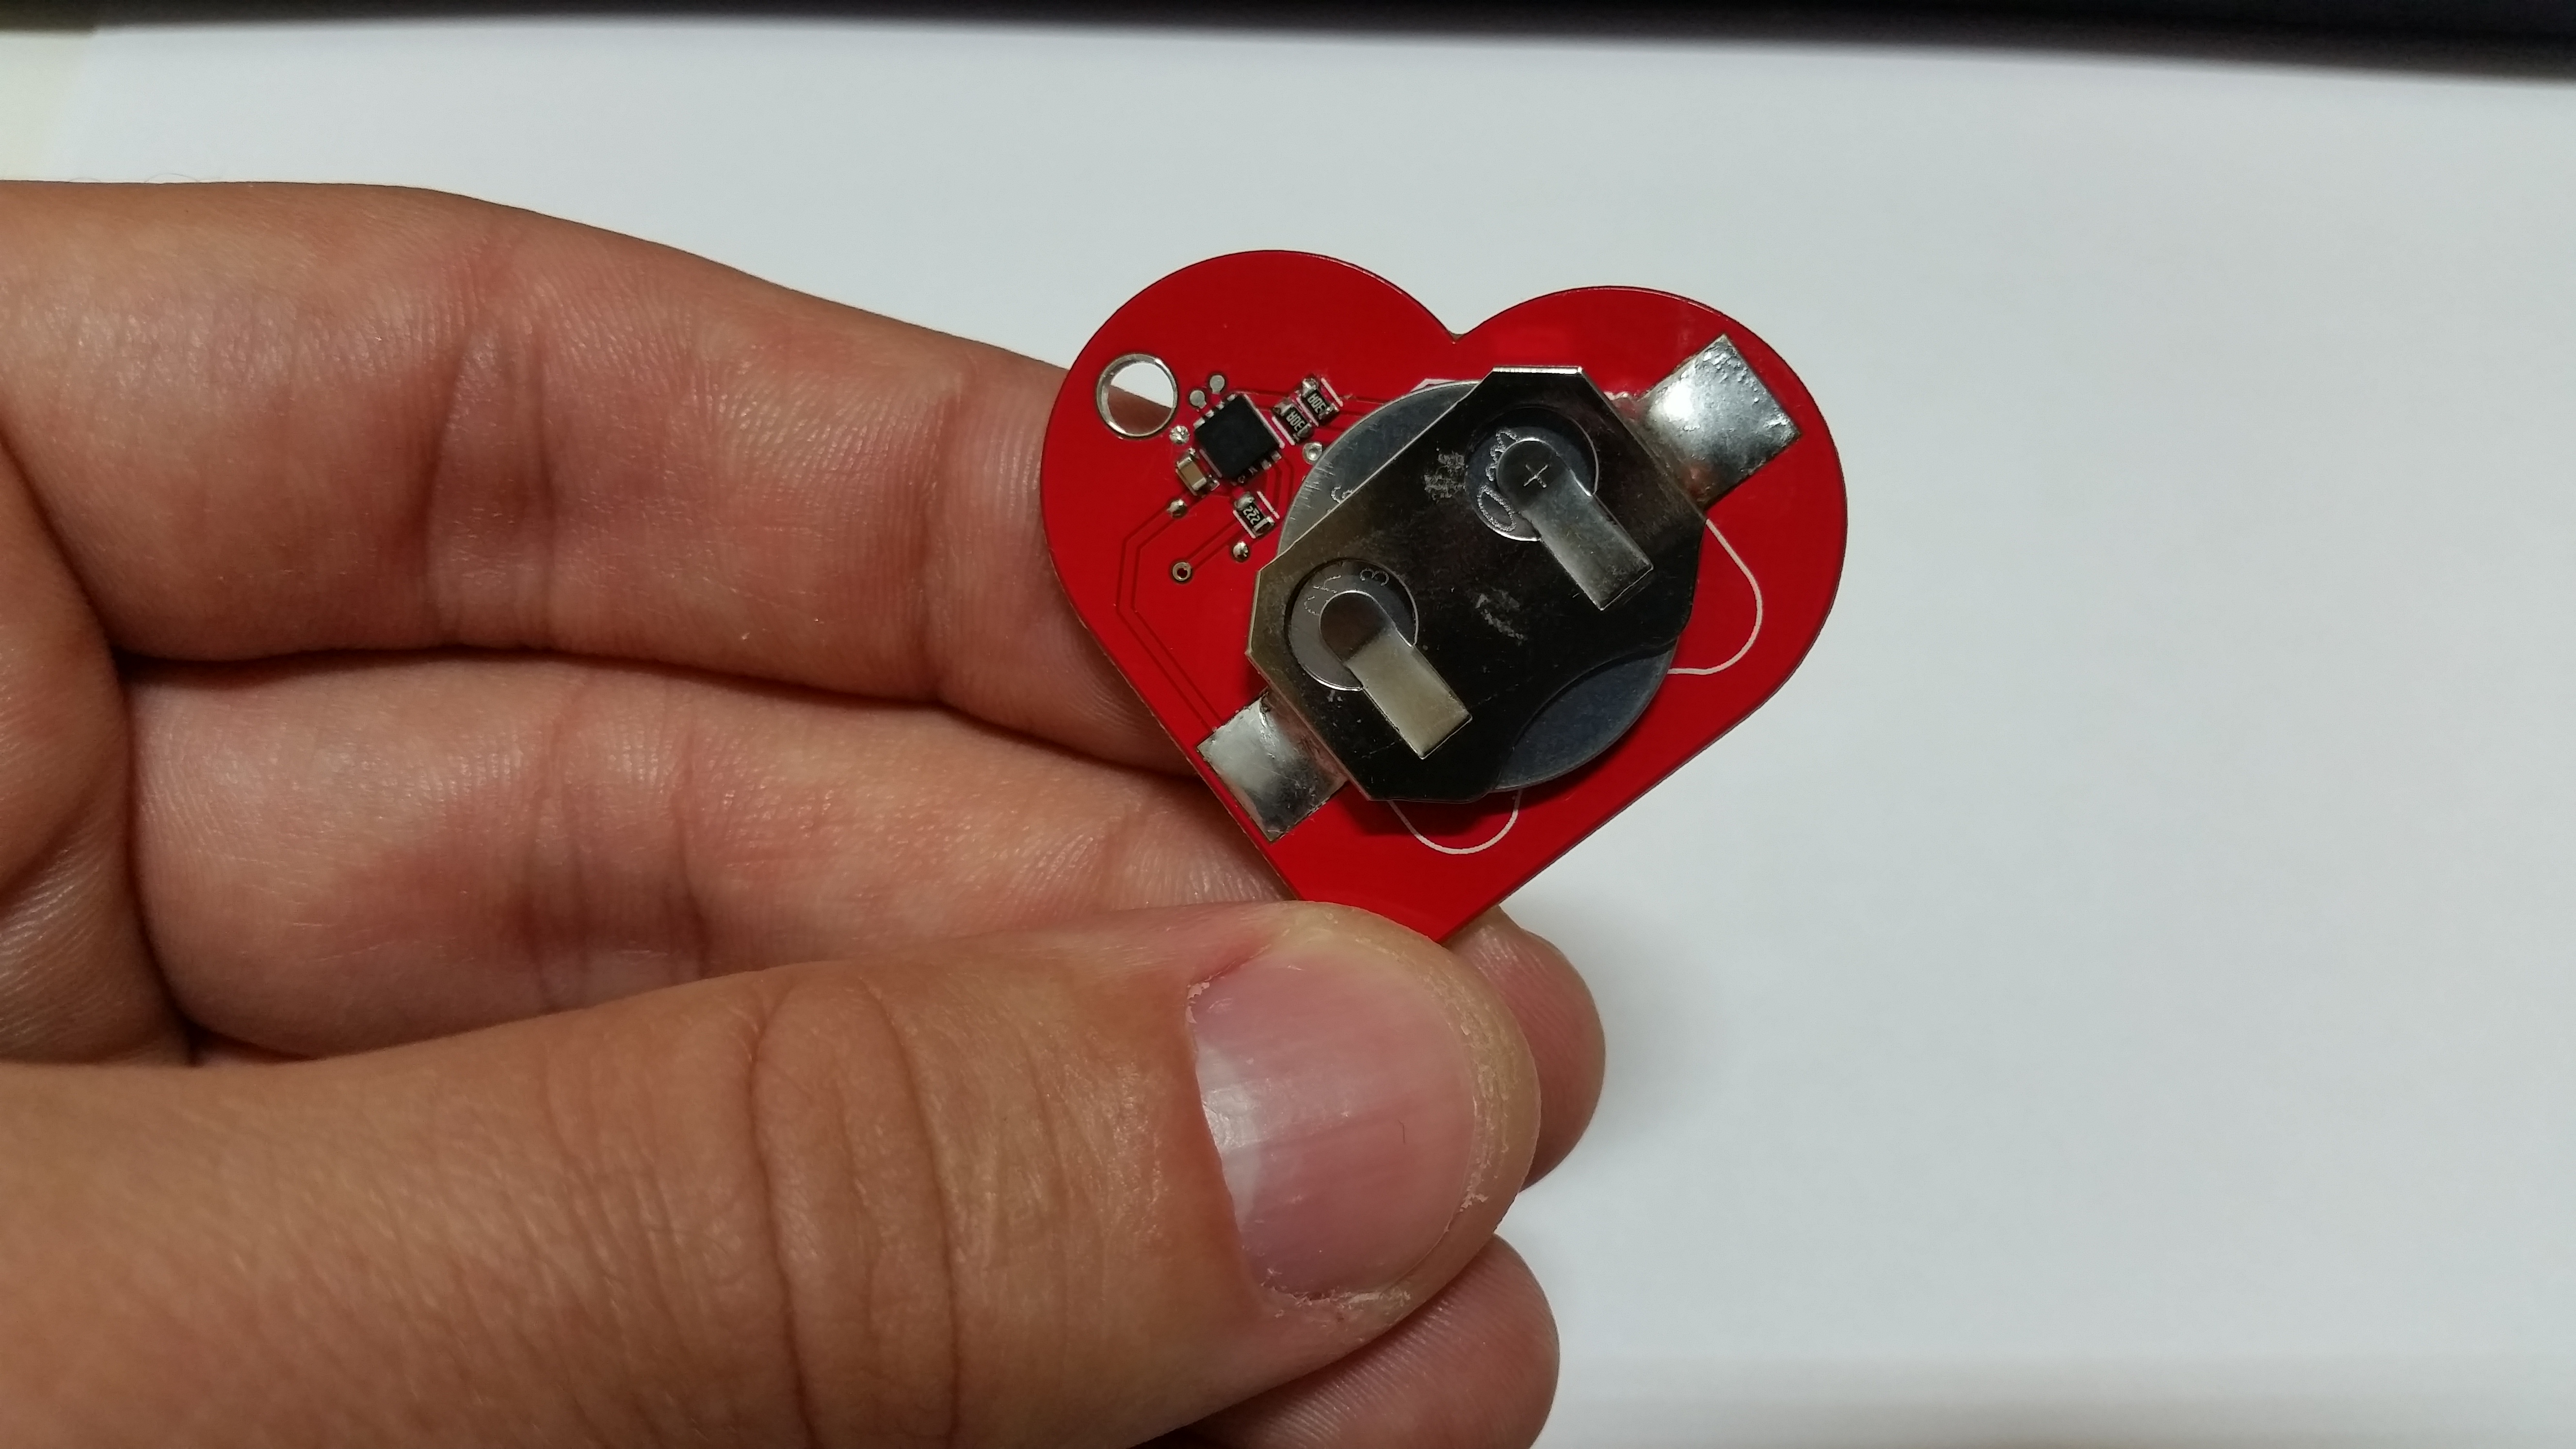
On the back side there is a battery holder for coin cell battery, microcontroller (MCU) and four passives to support the MCU and front LEDs.
Components that you will need for this project
- PIC12LF1822 Microcontroller, the brain behind our device
- CR2016 for providing power to our device
- 4.7uF capacitor
- Two 200 Ohm resistors
- and two RED LEDs
Detailed BoM is attached with rest of the source files.
Let’s see how this thing actually works
We want to detect when someone is interacting with our keychain and when that happens we will turn on the LEDs to signify something like “I love you”, “I miss you” or anything else that you want. Since this is a keychain first, it has to look and feel nice. Putting a tactile button would sure make our life easy but it would also make device bulky and ugly, and we don’t want that. So instead of using a tactile button, we are going to use touch sensor aka cap sense. Basically same thing that you have in phones touch screen, payment terminals and etc.
How cap sense works (skip this part if you are not interested into technical details)
How it works can be explained in a infinitely complex way and also a very very simple way. Let’s look at the simple explanation.
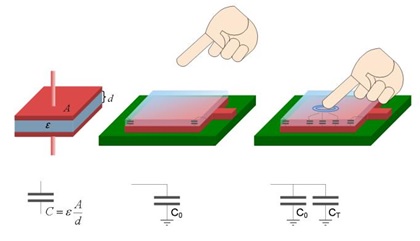
Imagine you have two conductor plates and a dielectric (insulator) in between, something you can easily create on your two layer PCB with traces on top and bottom layer for example. And let’s say we keep one trace at GND level and other one at some voltage V.
What you have there basically is a capacitor!
Okay great, now if we recall, the time to charge a capacitor to a certain voltage is constant. Also to discharge it to certain voltage is constant.
Now if we start charging and discharging that capacitor, we will see that it takes some time T to finish charging and discharging. Okay, it takes X seconds to do that, now what?
Well if you touch that second trace with your finger, what you will do is add your body capacitance in parallel to your capacitor that you have created on a PCB. What that means is now that your PCB capacitor has value of C=(CPCB + CBody).
If designed in properly, your body capacitance can affect the PCB capacitor value and change charge and discharge time so you can easily measure that there is a significant increase/decrease in time needed to charge and discharge your PCB capacitor, which in turn tells you that there is a finger (or some other capacitive body) present on your PCB.
The whole technology and design process has been simplified for the sake of explaining the capacitive sensing approach in simple and understandable way. Making a good capacitive sensing design is however not quite that simple, but you’ve got the picture.
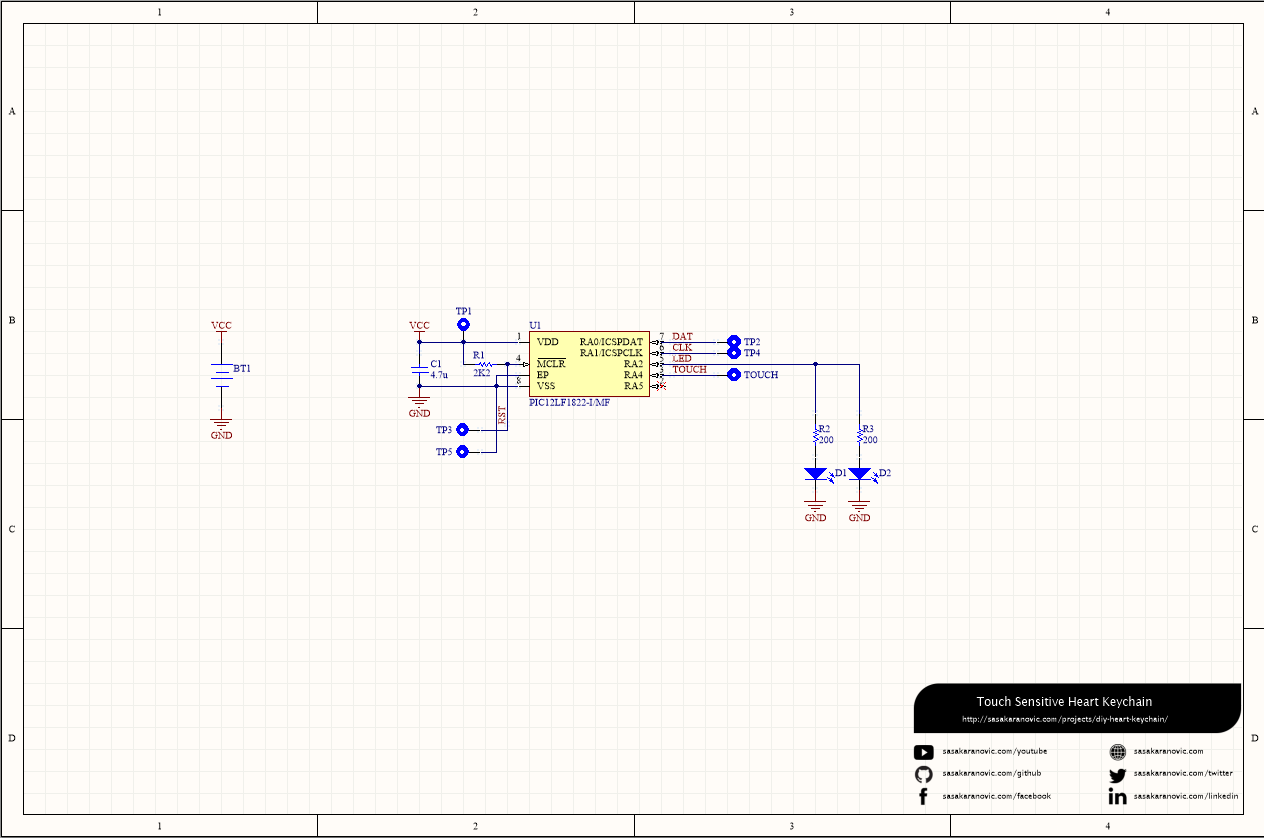
Schematic and PCB design

Where can I get source files?
As always, all source files (Schematic, PCB design, Source code and more) are available on my GitHub page so feel free to go there and check them out!
Final thoughts
This project turned out great, my wife and our parents absolutely loved it. Unique way to show someone you care about them and they will be reminded of that every time they take a look at their keys.
You can make your own or you can change to a different shape and turn it into your maker lab badge, birthday gift, logo of your (favorite) band or… possibilities are endless. If you do make your own, please share your design with me. I would love to see what you end up doing with this.
[…] en forma de corazón clave de la cadena de tiene una meta – a parpadear un par de LEDs de color rojo cuando un capacitiva si se toca el […]
[…] heart-shaped key-chain has one goal – to flash a pair of red LEDs when a capacitive button is touched. He was able to […]
[…] LED Heart Keychain – [Link] […]
Hi!
Looks awesome !!
How long the battery last?
Best regards!
Hi!
It depends how often you interact with the keychain as well as what quality your CR2016 battery is what type of LEDs do you end up getting.
I haven’t (yet) spent any time benchmarking or optimizing it (since it was a weekend project) but I expect battery to last couple of months,
depends how often you play with it.
Also there a re some really bad CR2016 that would last for a couple of weeks.
This could definitely be pushed much longer if you spend some time tightening firmware.
Interesting! I am considering to make three heart keychain,one for my father,one for my mother and one for me.
I have bought the following parts: FDK America Inc. CR2016,
Microchip Technology PIC12LF1822-E/MF. Capacitor, resistors and LEDs I used the old.
Thank you for you sharing.
Awesome! Go ahead and let me know how it turns out!
I initially made this for my wife and later on we also gave one to our parents and they absolutely love it.
Sasa My 12 y.o. wants to try his hand at making this at our local maker lab. I’m not technical myself but learning with him… You have code with this project.. Do you program the controller before or after the board is built?
Hey Steve,
I’m happy to hear that!
It doesn’t make any difference if you program the controller before putting it on PCB or after it’s already on.
There are 6 test-points in the design that you can use for on-board programming.
Let me know how it turns out!