First, let’s see it in action
It’s a bit hard to capture how this clock really looks, especially since my camera doesn’t really appreciate when there are sixty LEDs glowing into it. Trust me, it looks even cooler when you see it live.
Now the animation above might not make too much sense unless I explain to you how the clock works:
- RED led is hour “hand” showing the current hour
- GREEN led is minute “hand” showing the current minute
- YELLOW leds are fixed and they show hour markers (12, 1, 2 and etc)
- Elapsed minutes are “filled” with colors of the rainbow and rotate over time
Now that you have all this information, you can actually read that clock in the animation above is actually showing that it is 4:55

Driver board 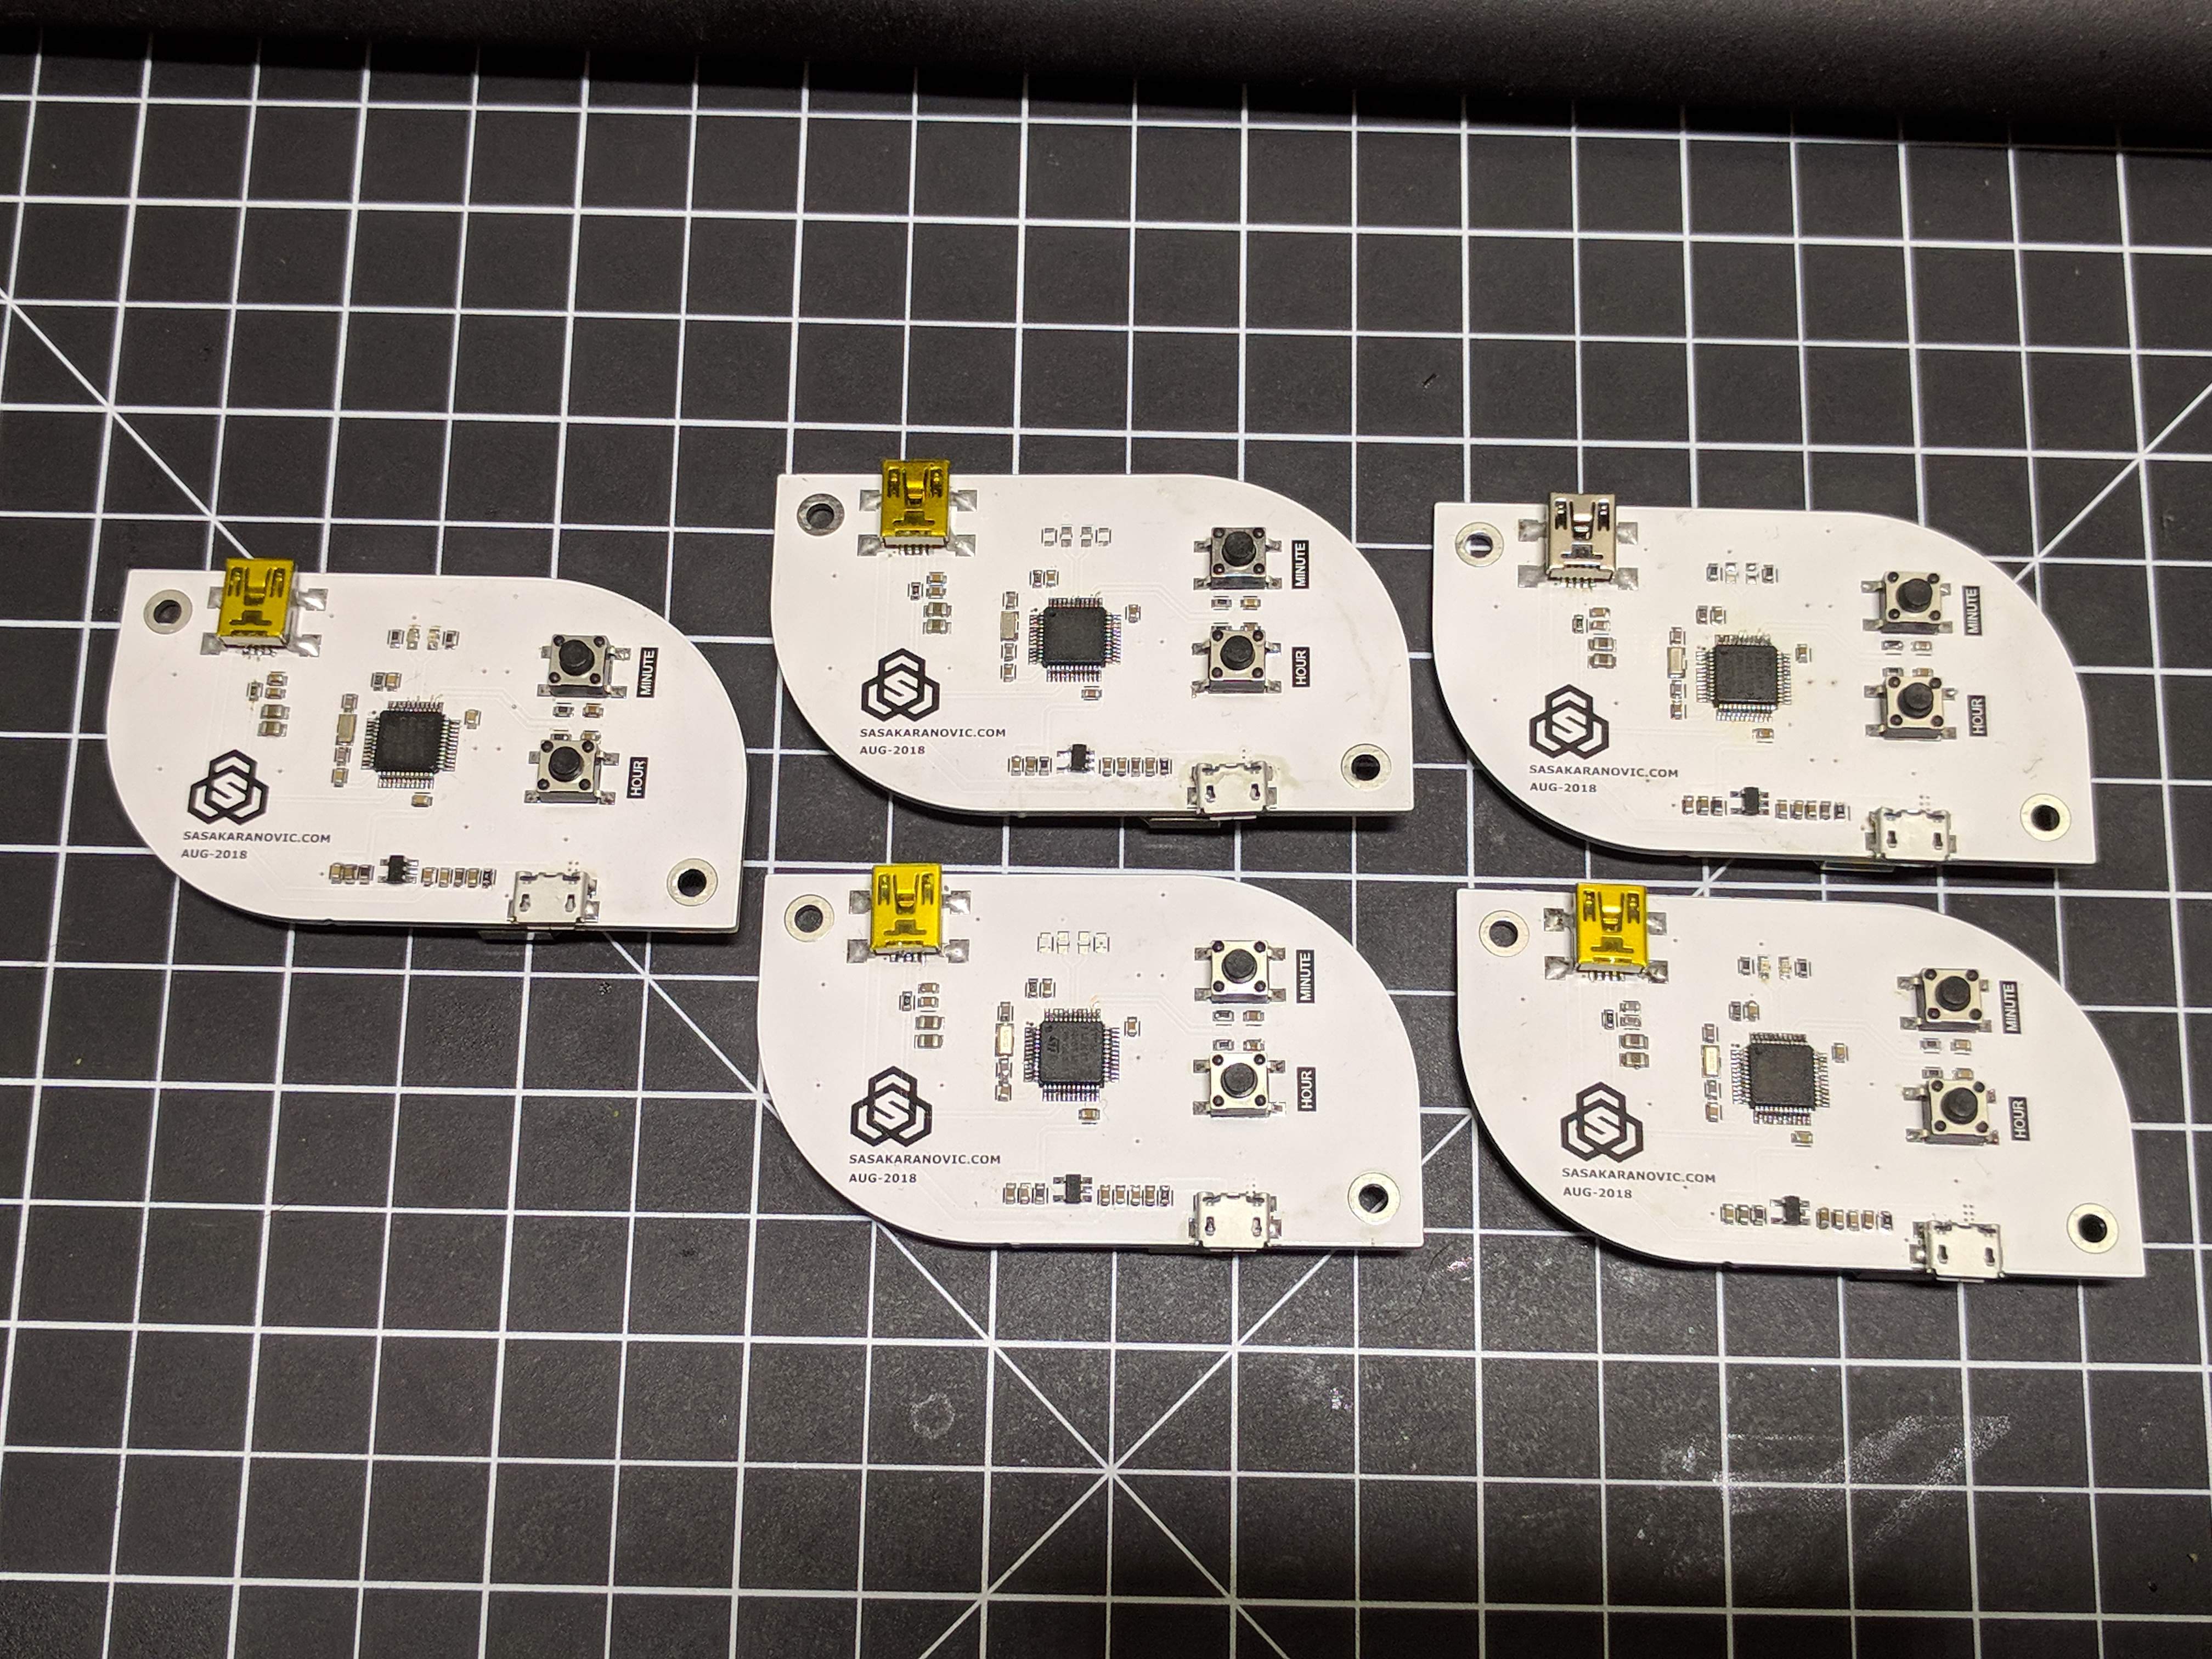
Boards populated
Inspiration for this project
TL,DR; I wanted to build myself a cool clock that would look nice, be different and make absolutely no sound. And so I did. This post is about how I did it.
There is something special about mechanical (analogue) clocks; not only do they keep accurate track of never-ending passage of time, they are also work of art. However, I often find myself working on a project in the middle of the night, when everyone else is sound asleep. Now during the day, clock, you don’t event notice it from all the noise that is happening around; but during night time you can hear every, single, tick. It’s like tick-tock, tick-tock… after a while it becomes annoying or distracting to say the least. So I wanted to make my own timepiece that would look cool, be different than what you can buy or see around and also, it must not make any noise. Also, full disclosure, I built this clock for my self first, then my parents and my friends saw it (while it was till rough around the edges) and asked if I can build one for them too. So I decided that I want to design a clock that will be unique, hand-made and something that I can give to my close friends and relatives. Also I wanted to “gift” this project to open-source, open-hardware community so others can hopefully learn from it and take it further.
Component selection
- WS2812b ring with 60 LEDs [AliExpress]
- STM32F103 microcontroller
- Blue pill [eBay]
- Nucleo development board [DigiKey]
- CR2032 battery for RTC backup
- Tactile switches
Reasoning behind component selection
I needed something that looks like a clock, has sixty equally spaced LEDs and is easy to drive. Enter WS2812b ring. It looks cool, it has sixty LEDs arranged in a circle, it’s easy to drive and… I have them in my drawer.
For microcontroller I went with ST’s Nucleo eval board for ST32F103 that I had laying around, and also I realized that anyone can get a Blue Pill “clone” from eBay for dirt cheap.
When I prototyped this project I used STM’s ST32F103 Nucleo board, after that I soldered few wires to it’s cheaper cousin, also known on eBay as Blue Pill.
Great thing is that if you want to build this project yourself but you are not too into designing your own PCB and/or writing your own firmware, you could order all parts from eBay, checkout firmware from Git and you are good to go.
Schematic
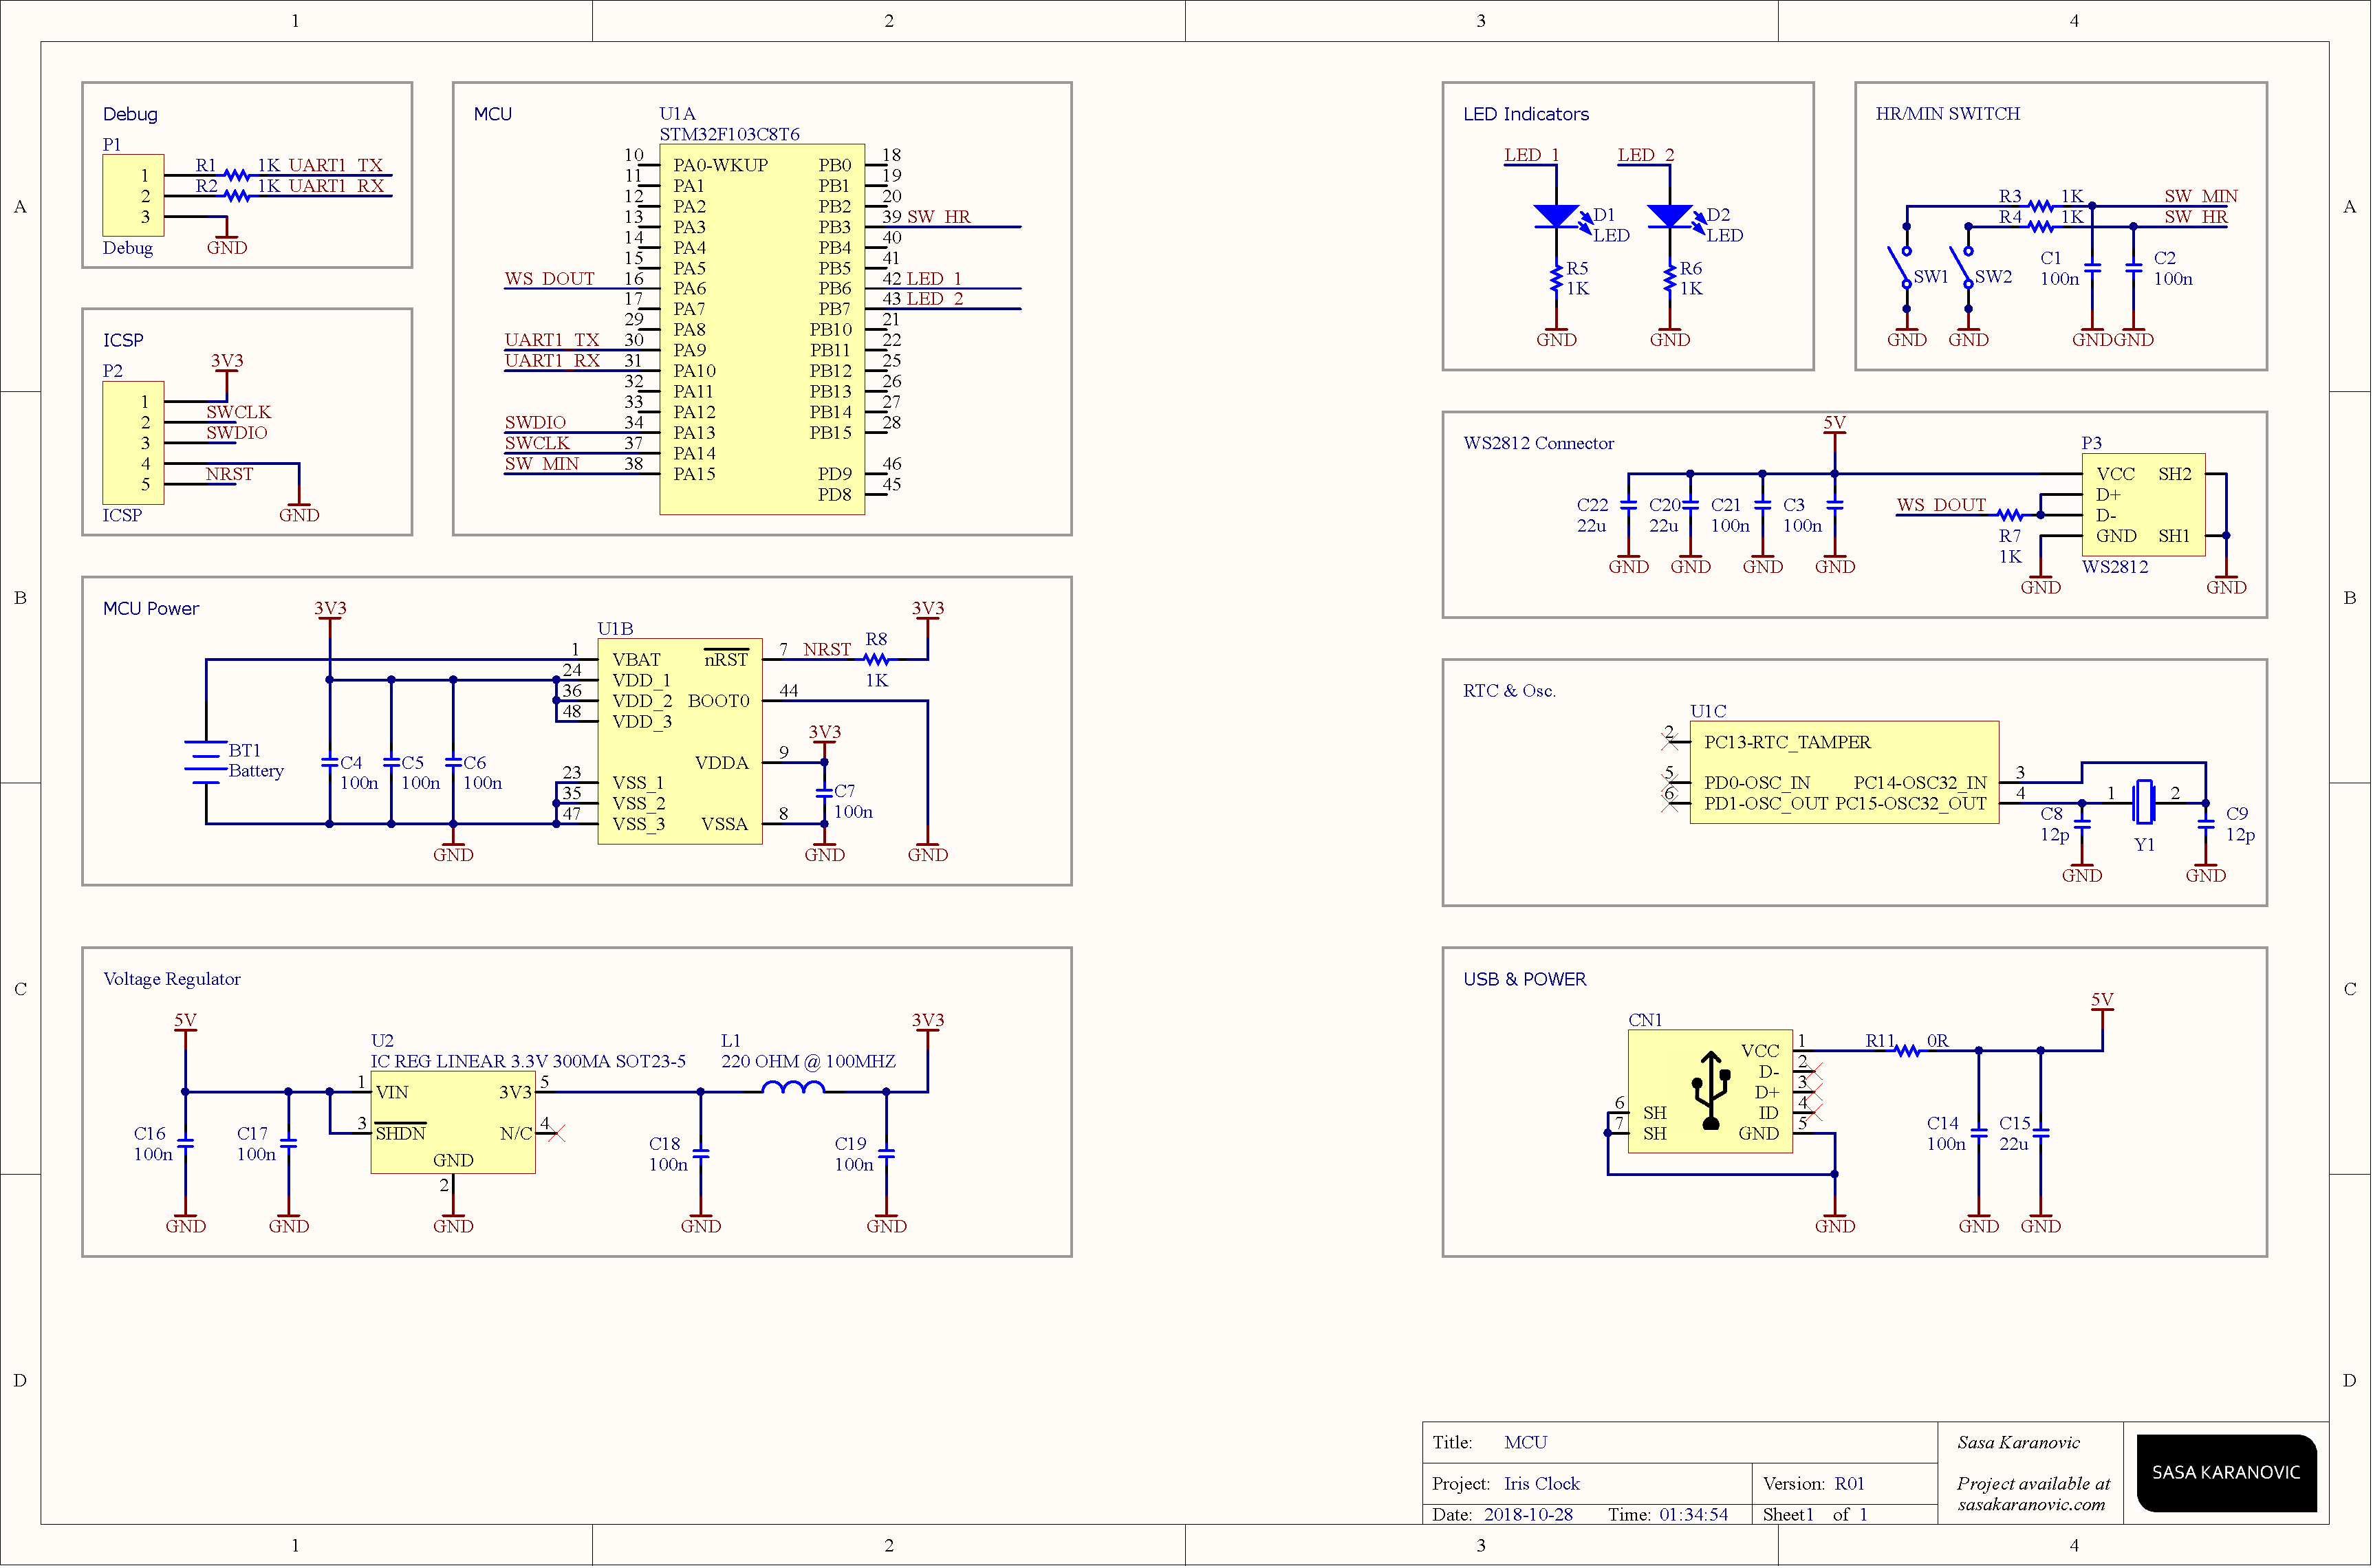
This is a very simple project, therefore schematic is very straightforward.
Power to the board is delivered through micro USB (CN1) and passed through to WS2812 LEDs (P3). Microcontroller (U1) works on 3v3 rail, so we use LDO (U2) to step down USB’s 5V down to 3v3. We need an accurate time reference so we are using 32.768KHz crystal and feeding it to our RTC to keep track of time. Also we have coin cell battery (BT1) so we can keep track of time when USB cable gets disconnected. And last, but not least, we have two buttons (SW1 and SW2) to adjust hours and minutes on the clock. Connectors P1 and P2 are for debugging and programming the board and LEDs (D1 and D2) are indicators for button presses, or to be used as general purpose “UI”.
PCB Layout

3D render of Top PCB side 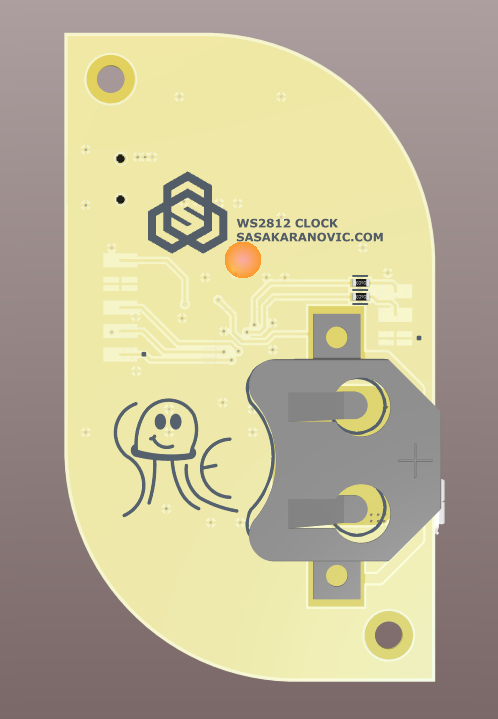
3D render of Bottom PCB sideTop (left) and Bottom (right) side of the PCB side-by-side
There is handful of components that make this board tick, that makes PCB layout very simple. One of the things that I had in mind while designing it was that this board could potentially be on someones desk or someones wall, so I didn’t want it to look “too busy” with silkscreen and designators, and that’s also the reason for non-standard board shape. So far, feedback is that people really like it, so that’s awesome. 🙂
Source files
As always, all source files are available on GitHub in my RingClock repository.
Conclusion
Making this project was a lot of fun, especially since I knew who I’m making it for and how they are going to use it. Also after I finished it, my friends absolutely loved it and are using it every day.
With the source code and other design files, I hope this project would be very easy to replicate and also can serve as a great example or starting point for those who want to get their feet wet with STM32F103, WS2812 LEDs and more.
Let me know your thoughts in the comments below and also what would you like me to make next?! I really appreciate every piece of feedback!
Where did you get the Circular PCB for the LEDs ?
Hi Don,
There is a link in `Component selection` part of the post showing AliExpress search query that you can use to find these types of LED boards. Also if you search for `WS2812 LED ring` you will find a bunch of them and then you can pick your flavor (white pcb or black pcb, number of LEDs and so on).
What tools/tool-chain did you use for IDE, compiling, and device programming?
Hi Graham,
In the firmware folder you can find a makefile that allows you to conveniently compile and flash this project. You can compile it using ARM GCC compiler and flash it either via ST-Link or J-Link. As for IDE, I was using just a text editor (Sublime text) but you can use whichever you prefer.
I will also update the read me file inside firmware folder in the Github repository.
Let me know if you need help!